

Nothing says indulgence quite like a scoop of rich, creamy Pistachio Gelato. This blog will take you through the delightful process of creating Homemade Pistachio Gelato from scratch, infusing your kitchen with the essence of Italian tradition and the robust flavor of pistachios.
Origin of the Recipe:
Gelato, a beloved Italian dessert known for its dense texture and intense flavor, dates back to the 16th century. Pistachio Gelato, in particular, has a special place in the hearts of gelato aficionados. Originating from the sun-kissed island of Sicily, home to some of the world's finest pistachios, this flavor is a testament to the region's love for these green nuts.

Homemade Pistachio Gelato
30 min
10 min (Chill Time: 4 Hours or Overnight)
8
Dessert
Italy
Ingredients
- Whole milk: 2 cups
- Heavy cream: 1 cup
- Granulated sugar: ¾ cup
- Unsalted pistachios: 1 cup (finely ground)
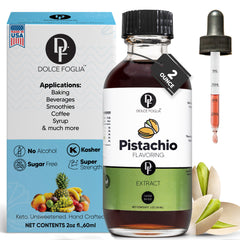
- Pistachio extract: 1 teaspoon
- Egg yolks: 4
- Salt: A pinch
Directions For Homemade Pistachio Gelato
Step 1 Pistachio Paste:
Begin by blending the unsalted pistachios into a fine paste, adding a little milk if necessary to achieve the right consistency.
Step 2 Infuse the Milk:
Heat the milk, cream, and pistachio paste in a saucepan over medium heat until it reaches a simmer, then remove from heat.
Step 3 Whisk the Eggs:
In a separate bowl, whisk the egg yolks and sugar until light and frothy.
Step 4 Temper the Eggs:
Gradually add the hot milk mixture to the egg yolks, whisking continuously to prevent the eggs from scrambling.
Step 5 Cook the Custard:
Return the mixture to the saucepan and cook over low heat, stirring constantly until the custard thickens and coats the back of a spoon.
Step 6 Add Flavoring:
Remove from heat and stir in the pistachio extract and a pinch of salt. Let the mixture cool to room temperature.
Step 7 Chill:
Cover and chill the custard in the refrigerator for at least 4 hours or overnight.
Step 8 Churn:
Pour the chilled custard into an ice cream maker and churn according to the manufacturer's instructions.
Step 9 Freeze:
Transfer the gelato to an airtight container and freeze until firm, about 2 hours.
Can I make gelato without an ice cream maker?
Yes, you can manually mix the gelato every 30 minutes while it’s freezing to break up ice crystals.
How can I enhance the pistachio flavor?
Incorporate a drop or two more of pistachio extract to intensify the flavor.
Can I use salted pistachios?
You can, but omit the added pinch of salt from the recipe.
What makes gelato different from ice cream?
Gelato is churned at a slower rate and has a higher proportion of milk to cream, which results in a denser and more flavorful dessert.
Tips and Tricks:
Quality Ingredients: Use the highest quality pistachios you can find; it makes a difference in the flavor.
Smooth Texture: Strain the custard through a fine-mesh sieve for a smoother texture.
Storage: Store the gelato in a shallow container to help it freeze evenly.
Pairings and Serving Suggestions:
Complementary Flavors: Serve your gelato with a drizzle of honey or alongside a slice of almond cake.
Presentation: Garnish with whole or chopped pistachios for added texture and a professional touch.
Storing and Making Ahead:
Keep it Fresh: Homemade gelato is best enjoyed within a few days of making it.
Pre-Scoop: Scoop the gelato onto a parchment-lined tray and freeze. Transfer the scoops into a container for easy serving.
Customizing Your Pistachio Gelato:
Lactose-Free: Use lactose-free milk and cream alternatives to cater to dietary restrictions.
Vegan Option: Substitute the milk, cream, and egg yolks with coconut milk and a vegan thickener like cornstarch.
Nutty Variations: Experiment with different nuts like almonds or hazelnuts for a twist on the classic pistachio.
Crafting your own Homemade Pistachio Gelato is a rewarding process that results in a luxurious treat. By following this guide, you’ll create a dessert that’s both authentic and personalized. So scoop up the sweet rewards of your culinary efforts and enjoy the
